Rescue relays are volunteer-based transports where multiple volunteers work together to transport a small number of animals, typically across the state or across several states.
Volunteers drive or fly their portion of the route and pass the animal to the next volunteer in sequence, much like a relay race.
Since multiple volunteers are involved, coordinating a rescue relay can be challenging, but Doobert automates the process to make it more convenient for you!
With just a few clicks, you can auto-split your route into manageable legs, notify volunteers about your transport request, and monitor the overall progress of the transport.
Ready to create your first Rescue Relay Transport? Follow these steps!
How to Create A Rescue-Relay Transport
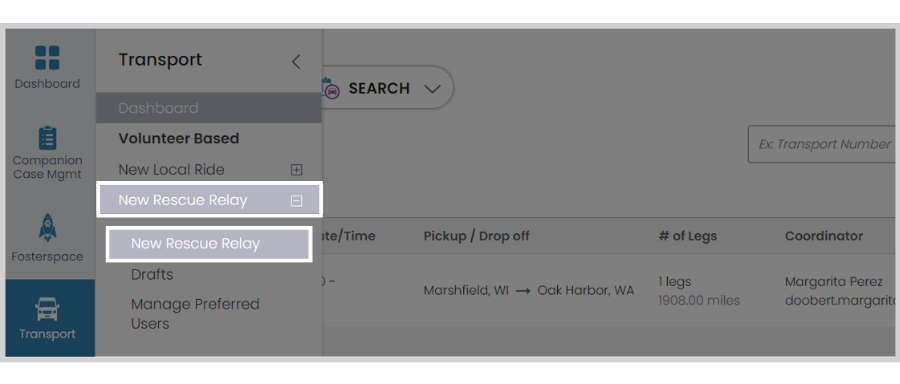
Step 1: Click on the Transport tab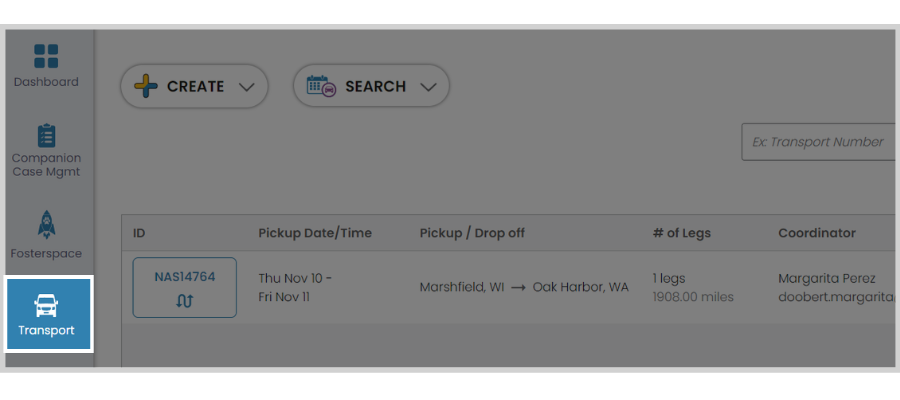
Step 2: Click New Rescue Relay
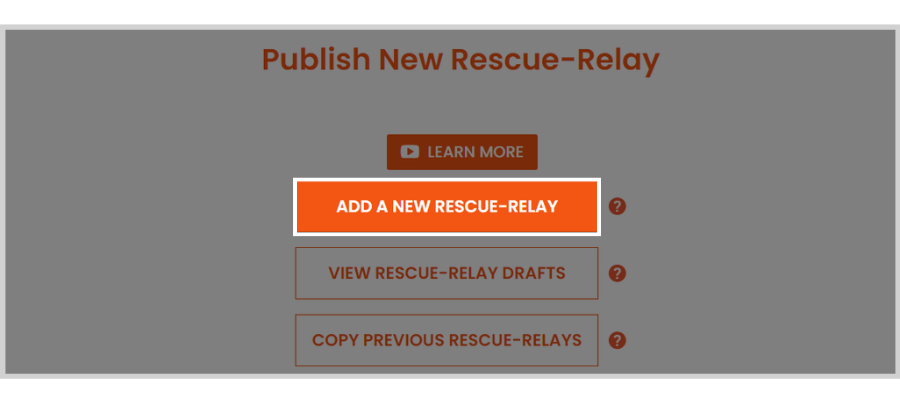
Step 3: Click Add A New Rescue-Relay
Step 4: Provide the transport information
At the top section, enter the transport name as well as the pick-up and drop-off dates.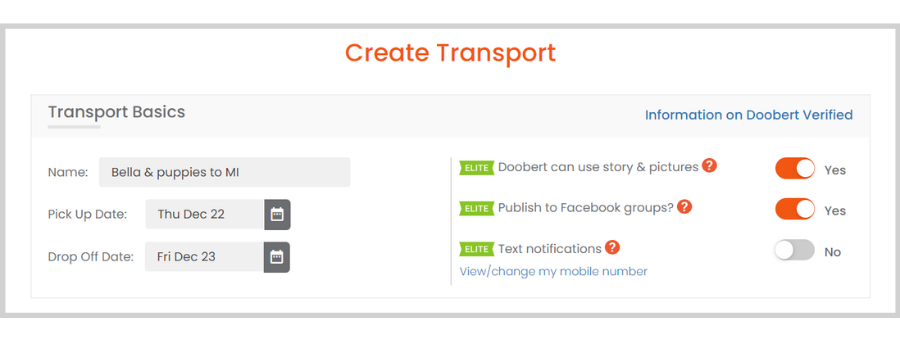
Then, provide the contact information and locations of the sending and receiving parties.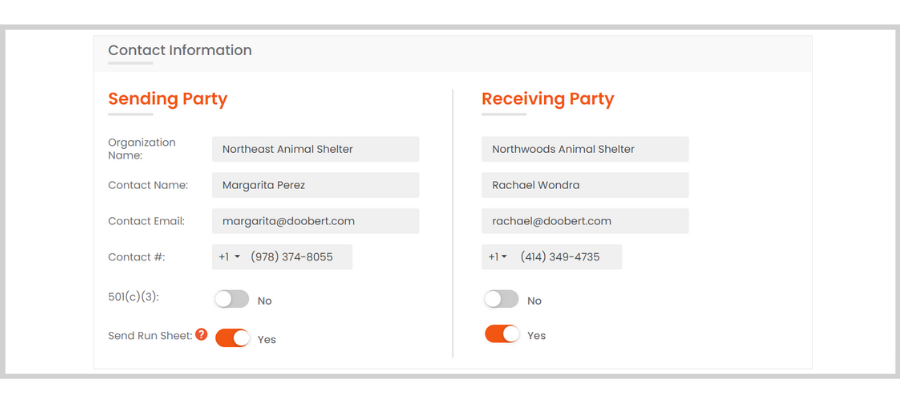
Lastly, add the animals that will be traveling and click Save & Continue.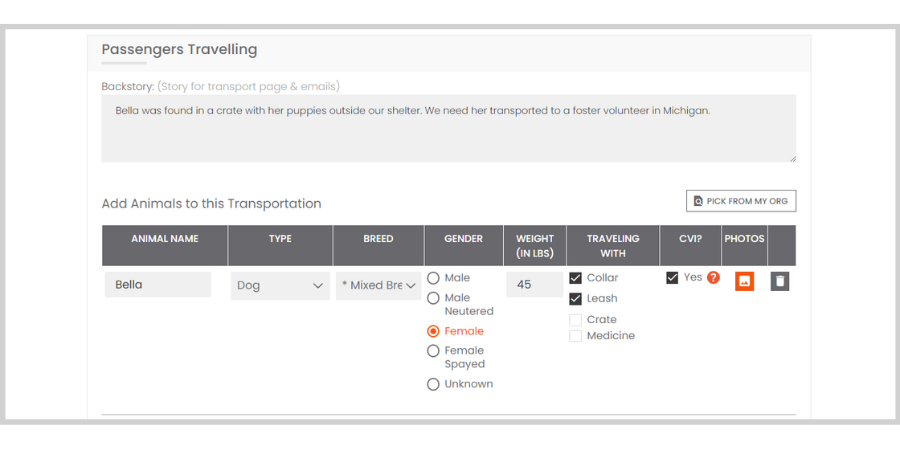
Step 5: Select the type of transport that you want
You can choose to manually split your route into legs or let Doobert auto-split it for you.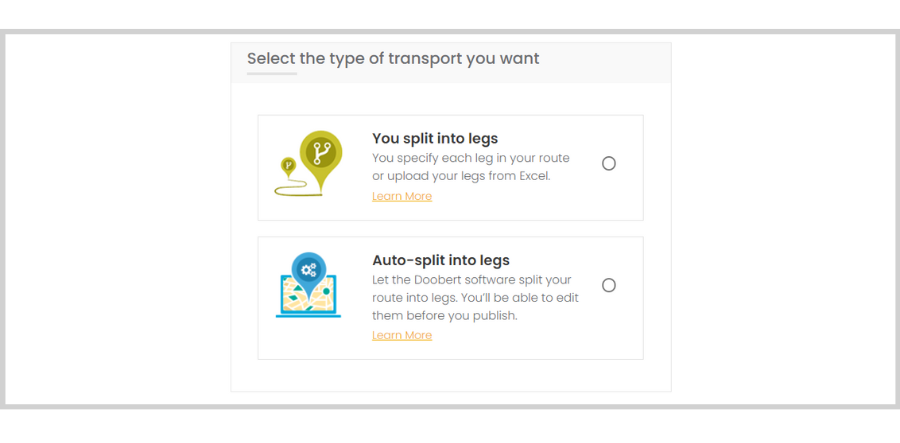
For the auto-split option, specify the details for the transport legs then click Continue.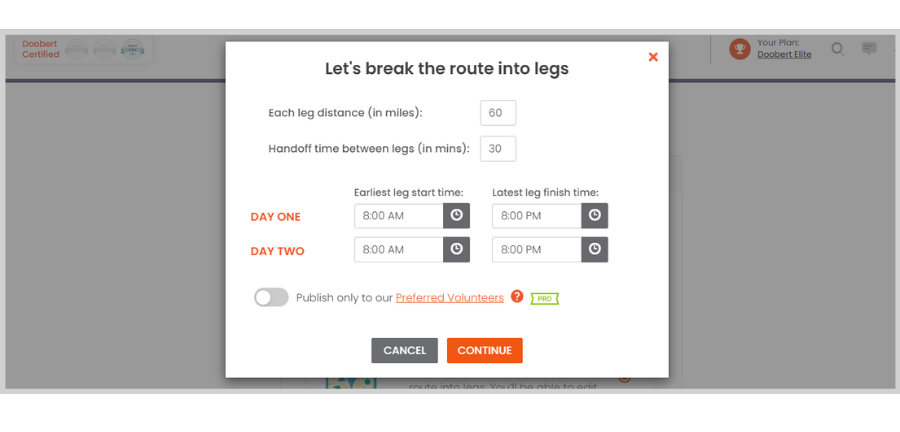
Doobert will then start splitting your route into legs based on the information you provided.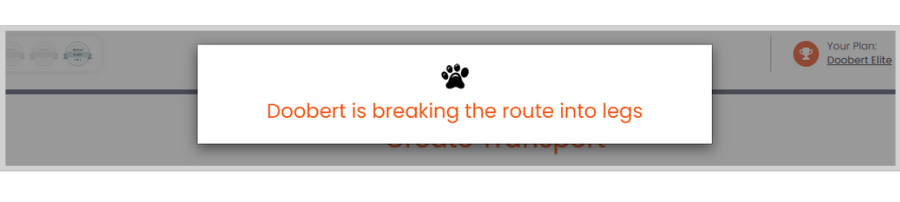
Once your route is split into legs, you have the option to add more (ground, aviation, or overnight legs) as well as edit or delete existing ones.

Step 6: Publish your transport
After double-checking all the leg information, go ahead and click Publish Transport to send email notifications to all relevant volunteer transporters.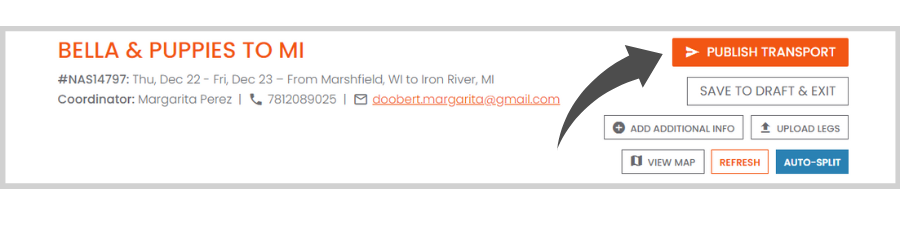
You can monitor the progress of the transport on your Organization Dashboard.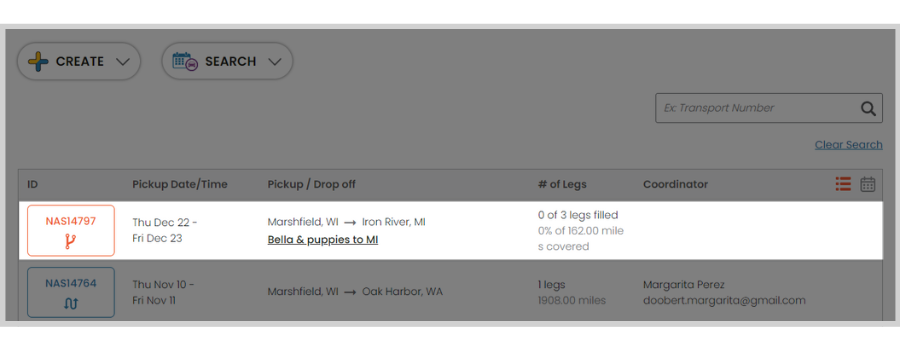
To view all the legs of the transport, click on the transport ID and you’ll be directed to a page with all the information on that transport.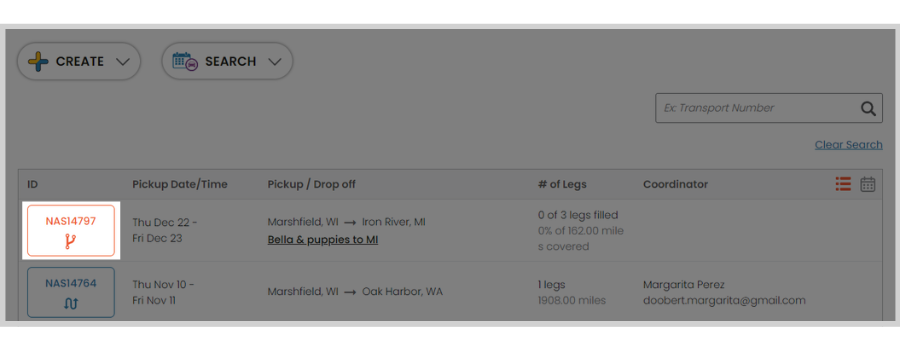
On that same page, you can sign up for legs yourself or assign them to non-Doobert users.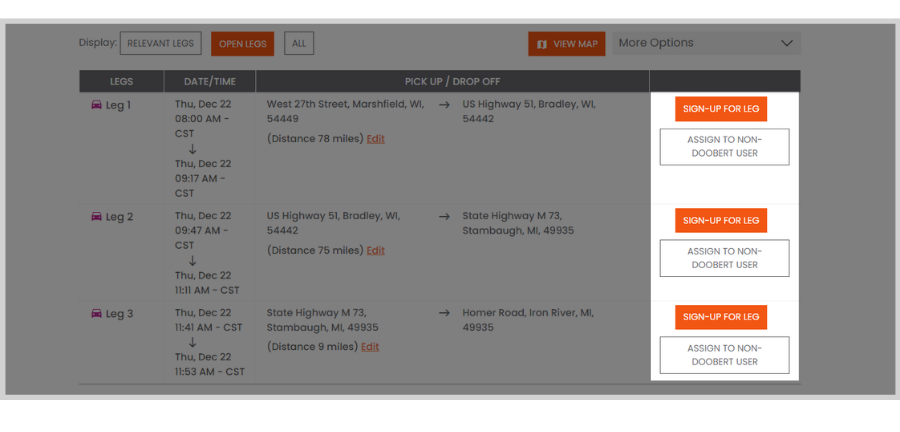
You can also edit the transport date, legs, and general transport information if needed.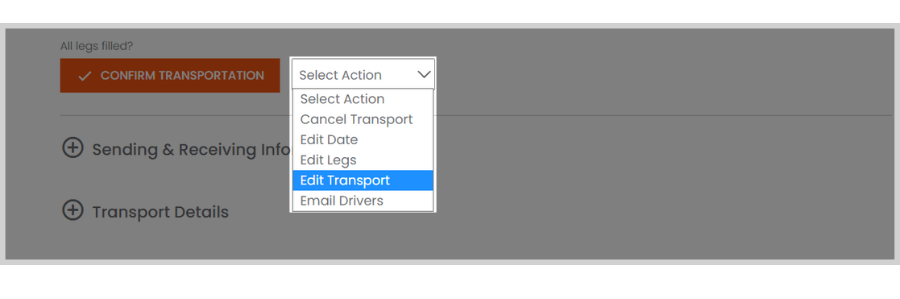
Additional Doobert Rescue-Relay Features
There are several features on Doobert that make not only creating but also monitoring rescue-relay transports more convenient for you. Learn more about them below!
Rescue-Relay drafts
When creating rescue relays, you have the option to save your transports as drafts so you can easily pick up where you left off.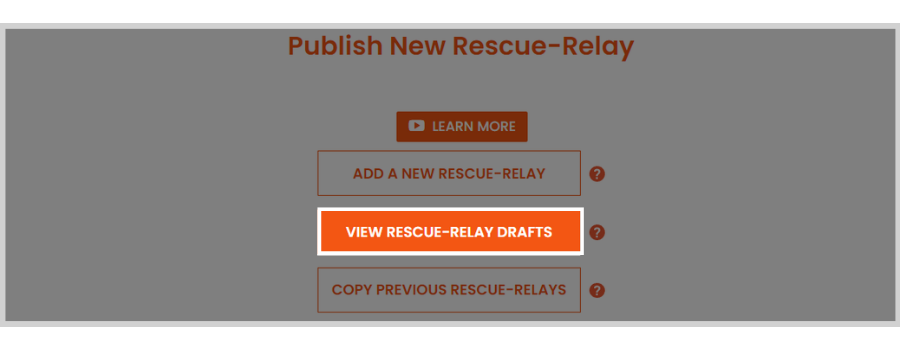
You just click on the calendar icon to edit the transport date and the pen icon to make changes to the transport information.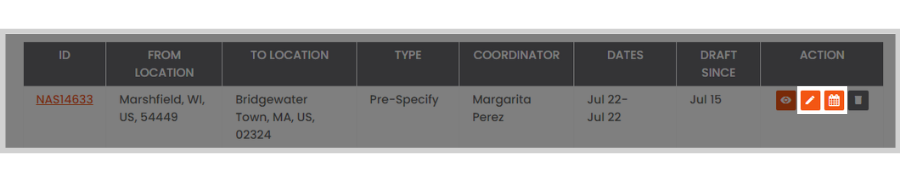
Copy a previous Rescue-Relay
Instead of creating the same transport from scratch, you can save time by copying the previous rescue relay!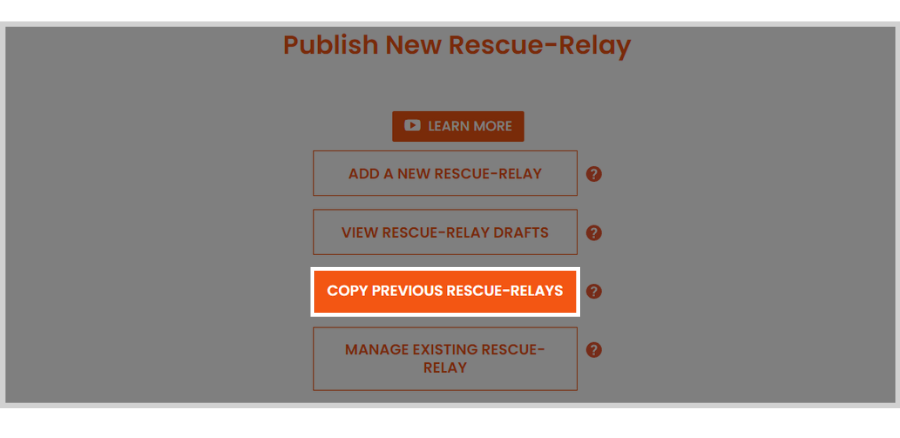
You just click the Copy Transport button, edit the transport date, enter the receiving party’s contact information, and you’re ready to Publish your transport!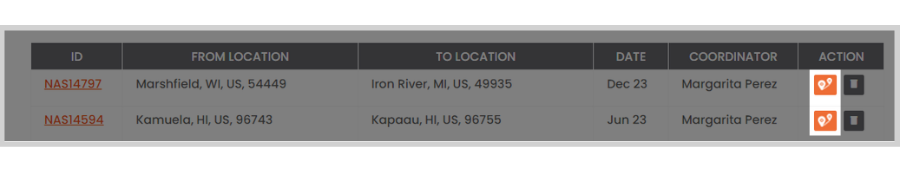
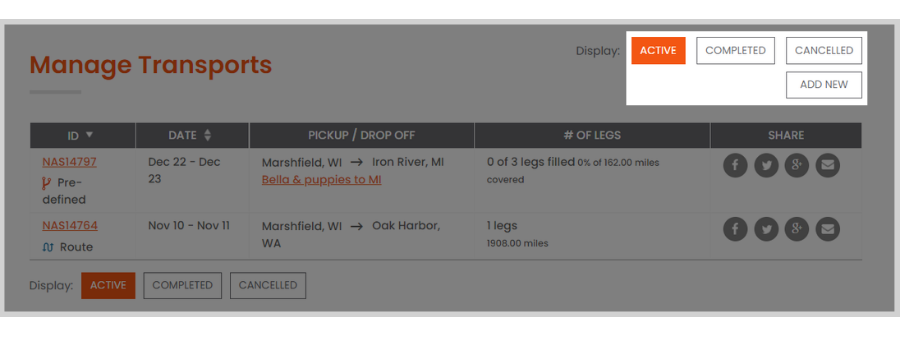
Manage your Rescue-Relays
Of course, you can also keep track of all your rescue relays in one place. 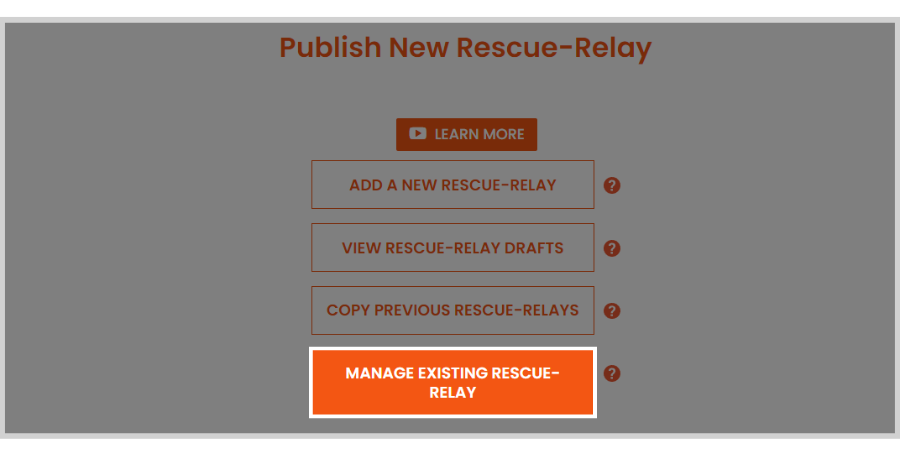
In the upper right-hand corner, you can choose which transports to display by clicking on the individual tabs.
And that’s all the features that can help you create and manage your rescue relays. We’re excited for you to start trying them out for yourself!
Sign up on Doobert today to get started!